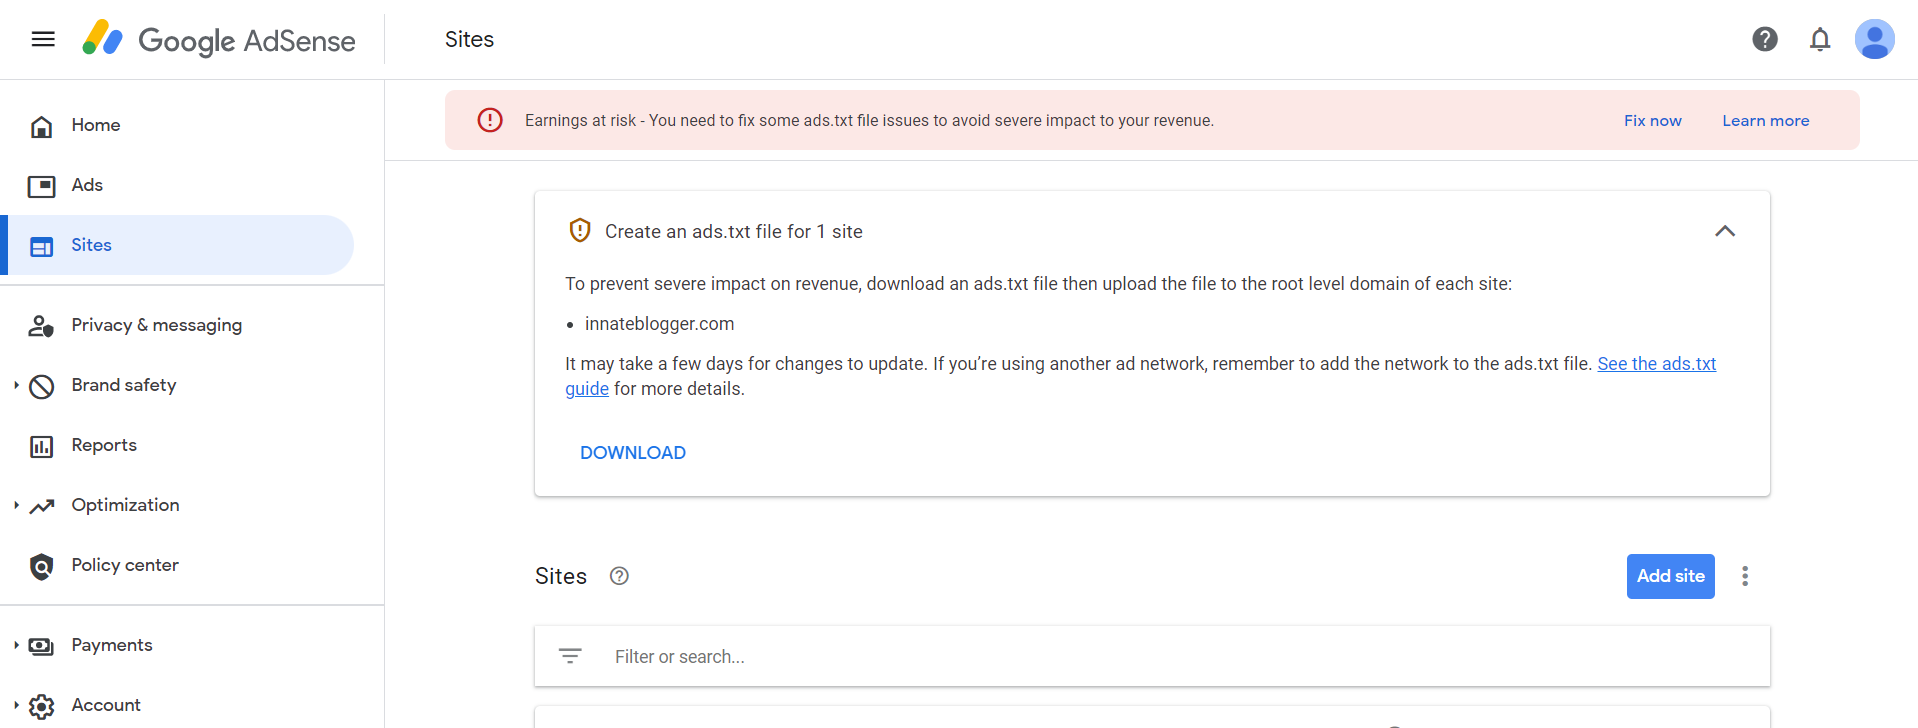
Does your account showing you notification to add ads.txt file to your website but you don't know how to add it your website because it's built on Blogger?
Nothing to worry! In this article, I will show you how you can easily add ads.txt file to your blogger website within 1 minute. Just follow the steps.

What is Ads.txt?
Authorized Digital Sellers, or ads.txt is an initiative that helps to ensure that your digital ad inventory is only sold through sellers (such as AdSense) who you've identified as authorized. That's why AdSense always asks you to add ads.txt to your website.
You can learn more about it from the ads.txt guide provided by Google.
Steps to add AdSense ads.txt file on Blogger website
So, let me just get straight to the point. Follow the below steps:
Download Ads.txt from AdSense
- Log in to your AdSense account.
- Go to Sites.
- You will see notification saying, "Create ads.txt file for site" with option for download.
- Download the ads.txt file.
- Copy the all contents of that text file.

Upload Ads.txt file to Blogger
- Log in to your Blogger dashboard.
- Go to Settings.
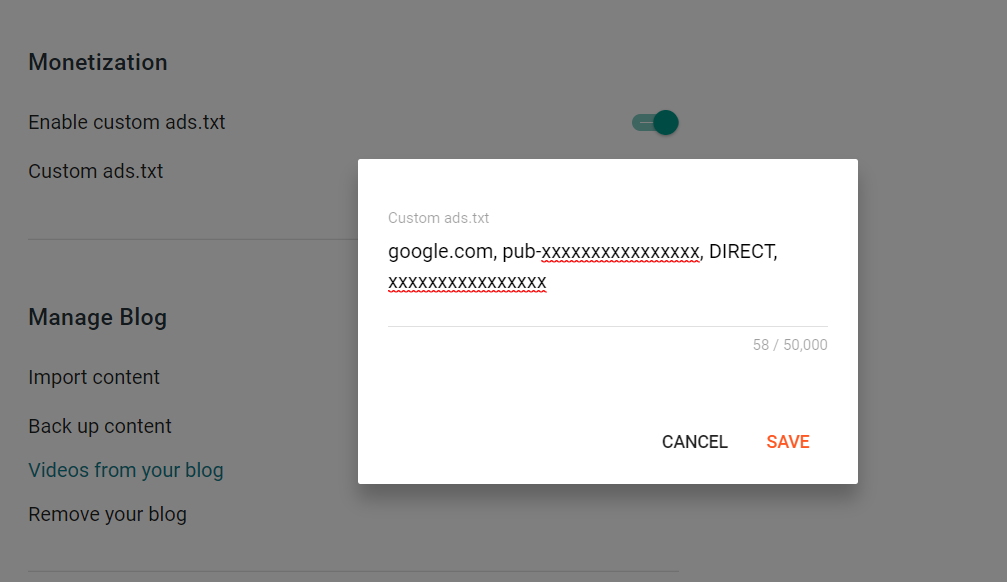
- Scroll down to the Monetization section.
- Enable Custom ads.txt.
- Click on Custom ads.txt.
- Paste the text that you copied from previously downloaded ads.txt file.
- Hit Save, and that's it.

Verify Ads.txt on your Blogger Website
To verify you just have to type /ads.txt after your website's URL and enter.
Example: https://www.yoursite.com/ads.txt