How to Serve Next Generation WebP Format images on your Blogger website, so that you can get a better Page Speed Score?
If you are looking for the answer to this question, then you reached the right article. Cause, this post will share with you the knowledge to improve your Blogspot website's page speed score by serving next-gen images.
So, what are these Next-Gen images?
NextGen image formats provide better compression of images without losing the quality of the image. As a result, NextGen images have less size than classic images formats like JPG, PNG, etc.
Some of the Next-Gen image formats are AVIF, WebP, JPG2000, etc. But, in this article, we will discuss serving WebP images on Blogger. But before that let's know a little about WebP format, and why we choose it.
What is WebP Image and Why you shall use it?
Some of you might be thinking what is a WebP image?
Coming straight to the point, WebP is an image format like JPG or PNG with less size. WebP image format provides lossless and lossy compression and is mostly used for the web.
According to Google, WebP images can be up to 3x smaller than PNG images. So, if WebP images are used on your website, your website will load faster without losing any user experience.
That's why it's better to use WebP images now. All modern browsers support WebP format, so you don't have to worry before using this format.
Also, if you use JPG or PNG images on your website, and then check Page Speed Score, then you can find Serve Images in the next-gen formats option in the opportunity section.
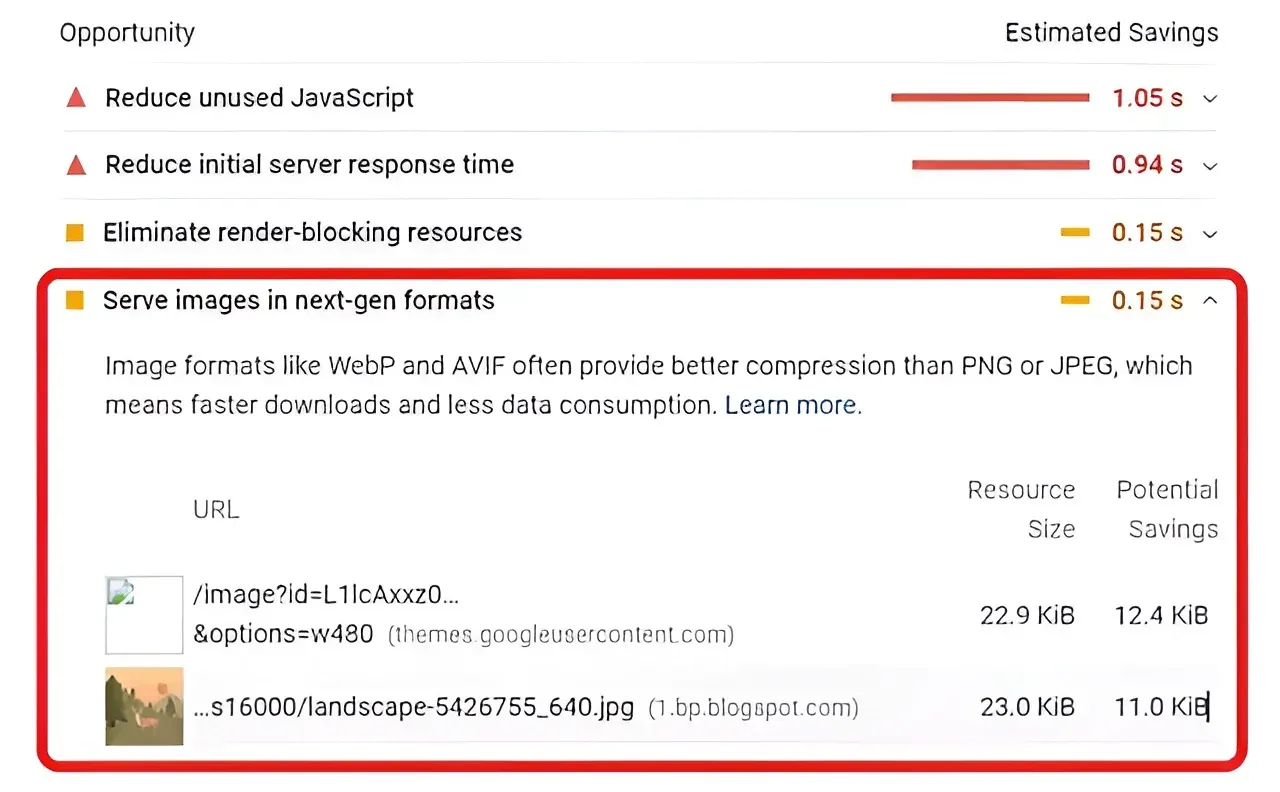
The use of WebP format images on your blog will increase your Page Speed Score.
Serve NextGen WebP Images in a Blogger Blog
If you are on WordPress you can easily serve WebP images by using some plugins. But Blogger doesn't have that kind of feature, so what to do?
Now, you may think like, I will just convert the image into WebP and then upload it to Blogger. I thought that too.
But, for some reason, it didn't work. I uploaded the image, it's all good, but when I check the Page Speed Score, it still tells me to serve NextGen images.
I don't know why it didn't work (maybe Blogger automatically converts images to JPG or PNG), but it helped me to find a better and easier way.
You can easily convert your JPG or PNG images to WebP after uploading them in Blogger.
Let me explain it, Blogger doesn't support plugins for Images, but it's backed by Google. Blogger's images server is part of Google's image server. And it can serve the WebP images, irrespective of the uploaded image format.
How to Use WebP images on Blogger
You can upload any image format on Blogger and then convert them to WebP directly using Blogger dashboard. Just follow these steps.
First, you need to upload and add the image to your post. Then you have to go to the HTML view of the post.
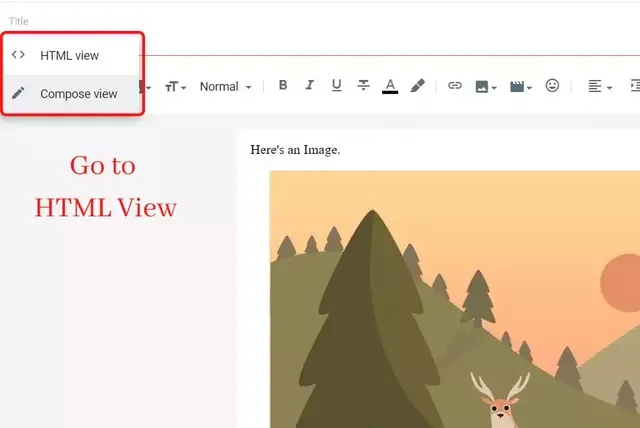
Once you go to the HTML view of your post, scroll down to the part where you uploaded the image (Or, you can simply search for the image title).
Note: Scroll down to the new update section for latest method.
You will find HTML code like this:
<div class="separator" style="clear: both; text-align: center;">
<a
href="https://blogger.googleusercontent.com/img/b/R29vZ2xl/AVvXsEg1_aesnI1sRhhycXmhjABi5Xz3hgpiAJ22oOf6tpdDpLmV3YHRFOtKSmJfFbTTs3ynf-b8wPXFQAdexyeXGRk5gSnzflzAhrQc0HjMACWOmPd2AKcpri9Q9hcq84yCE5vpQXuYOt0ku-c/s640/landscape-5426755_640.jpg"
style="margin-left: 1em; margin-right: 1em;"
><img
alt="Landscape"
border="0"
data-original-height="480"
data-original-width="640"
src="https://blogger.googleusercontent.com/img/b/R29vZ2xl/AVvXsEg1_aesnI1sRhhycXmhjABi5Xz3hgpiAJ22oOf6tpdDpLmV3YHRFOtKSmJfFbTTs3ynf-b8wPXFQAdexyeXGRk5gSnzflzAhrQc0HjMACWOmPd2AKcpri9Q9hcq84yCE5vpQXuYOt0ku-c/s16000/landscape-5426755_640.jpg"
title="Landscape"
/></a>
</div>
Now, we simply need to check the img tag in the HTML code. For those, who don't know HTML, let me just explain it a little.
Basically, the img tag in HTML carries all the information for the image uploaded on your website. And the src part is basically the source of your image.
So, as you can see in the source URL of the image, there's an s16000 part, just before the image file name. Now, to serve the uploaded image in WebP format, you simply have to add -rw after it.
So, it will become s16000-rw/landscape-5426755_640.jpg, and that's it. From now on the image will be served in WebP format for all your website visitors.
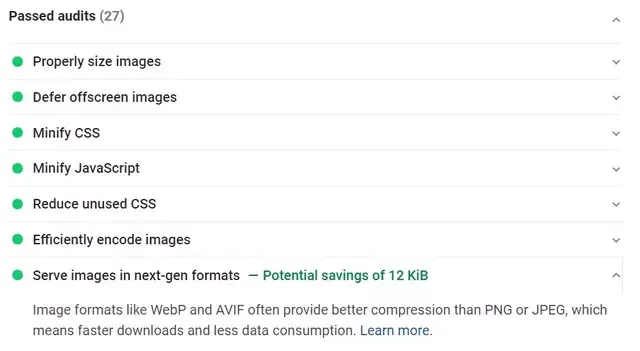
After doing this, if you check your website in Google page insights, you will find the Serve image in the Next Gen format option in the Passed audits.
Easy right?
But, keep in mind that you have to do this every time you upload a new image in your post.
Some Common problems regarding WebP serving on Blogger and their Solutions
In the above method, I discussed how you can serve WebP images on Blogger. Now, there are some confusions you might face.
- Like, instead of s16000, you can find s640, or s320, or some other part before your image file name.
- Or you can also find something like w640-h429, or w400-h268, or some other numbers.
Note: These numbers can vary depending upon your image size.
No, need to fear.
These are actually the width and height of your images. When you upload the image in blogger, it gets resized to medium size image(s320) automatically.
If resize the image to its original size then it will have s16000 before the image file name. In this case, you will add -rw after s16000 or s320.
But, if you resize it to Large or X-Large for your use you will find the 2nd scenario. This time you have to change w640-h429 with s640-rw.
Here, w640-h429 are actually defining the width and height of your image, you have to replace that with s640 and then add -rw. This will solve your problem.
New Update on WebP images on Blogger
Recently, there's been a new update in Blogger. Now, if you upload an image and view the HTML coding, you will see something like this.
<div class="separator" style="clear: both; text-align: center;"><ahref="https://blogger.googleusercontent.com/img/b/R29vZ2xl/AVvXsEg76C5YcdvP5R5ZU_vlcj7flSSrQJwhEJERol8mjYcqhsQbfrf9020MiuSUGebGW3WlllJ3PYziFnuaLeU0zhtaS9gd3hMekVzmy3izVzDClro3ttXkT2Xv4TK2Db4ksnmZUd8QNK4SpPOp41Zumy5uGcvAM3RSPV2xiJt7GClknf9uTP5x-seJow/s1600/serve-next-gen-webp-image.jpg"style="margin-left: 1em; margin-right: 1em;"><imgalt="Image"border="0"data-original-height="1080"data-original-width="1920"src="https://blogger.googleusercontent.com/img/b/R29vZ2xl/AVvXsEg76C5YcdvP5R5ZU_vlcj7flSSrQJwhEJERol8mjYcqhsQbfrf9020MiuSUGebGW3WlllJ3PYziFnuaLeU0zhtaS9gd3hMekVzmy3izVzDClro3ttXkT2Xv4TK2Db4ksnmZUd8QNK4SpPOp41Zumy5uGcvAM3RSPV2xiJt7GClknf9uTP5x-seJow/s1600/serve-next-gen-webp-image.jpg"title="Image"/></a></div>
As you can see the source URL of the uploaded image is different than before. It's now under some different domain.
But, it's easier now. At the end of the source URL, you can find the s1600 tag. Just change it to s1600-rw, and it will convert your image to WebP format.
Remember, the ending of the URL is s1600, cause I changed the image size to the original after uploading.
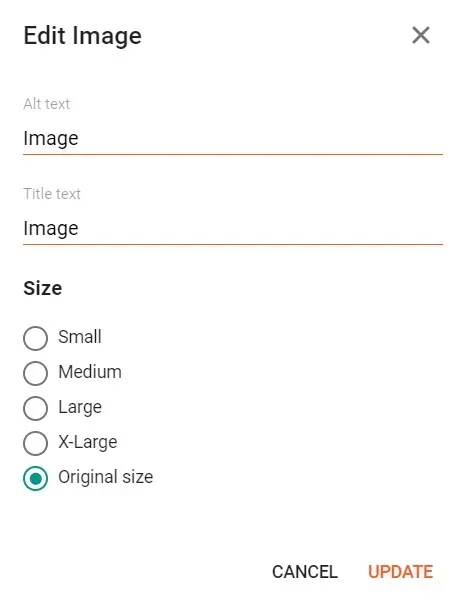
If you set it to X-Large, then you will see w640-h360 at the ending of the source URL of the image. So, you have to change it to w640-h360-rw for converting it to WebP format.
Similarly, you can add -rw at the end of the source URL for other image sizes, to convert them into WebP format.
Conclusion
So, this is all on how to serve on next-gen WebP images on Blogger websites. The method is pretty easy. It also improves your website's Page-Speed score, so you should definitely try it.
In case you are facing some confusion, then don't forget to comment.