Hey, are you trying to find how you can defer offscreen images on the Blogger website by lazy loading the images?
Then, you found the right blog. This article will show you how to lazy load images and improve the page speed score on Blogspot websites.
Website speed is a crucial factor for ranking on Google. And images on your blog posts play a huge role in the loading speed.
So, it is better to Lazy load images to reduce the loading speed of your website.

If your website is hosted on WordPress, you can easily lazy load images using WordPress plugins, but you don't have any plugin options for a blog at Blogspot.
So, I will discuss multiple methods in which you can lazy load images on your blogger website. But first, let's take a look at what is Lazy loading and its effects.
What is Lazy Loading
Lazy loading is a method to optimize website speed by delaying the loading of resources like images until they are actually needed.
For example, let's say you have a blog post with multiple images on it. Now, as soon as someone visits your website, all images on your webpage start to load. As a result, your website will consume more data. So, your website's initial load time will increase.
So, to solve this problem, you can defer the offscreen images. This means images will only load after the user scrolls down to the point where images are placed.

Why you should use Lazy Loading
There are a couple of reasons for using lazy loading on your blogger website. First of all, it will improve your site's Core web vitals score.
Google now takes Core Web Vitals Score as a ranking factor, so it can have a good effect on your search ranking too. Enabling the lazy loading feature on your website can help you to improve both First input delay (FID) and Largest Contentful Paint (LCP).

As a result, uses can see the webpage's content very quickly, which can lead to better conversions. So, you should definitely start to lazy load images on your blogger website.
How to Lazy Load Images on Blogger Website [Update]
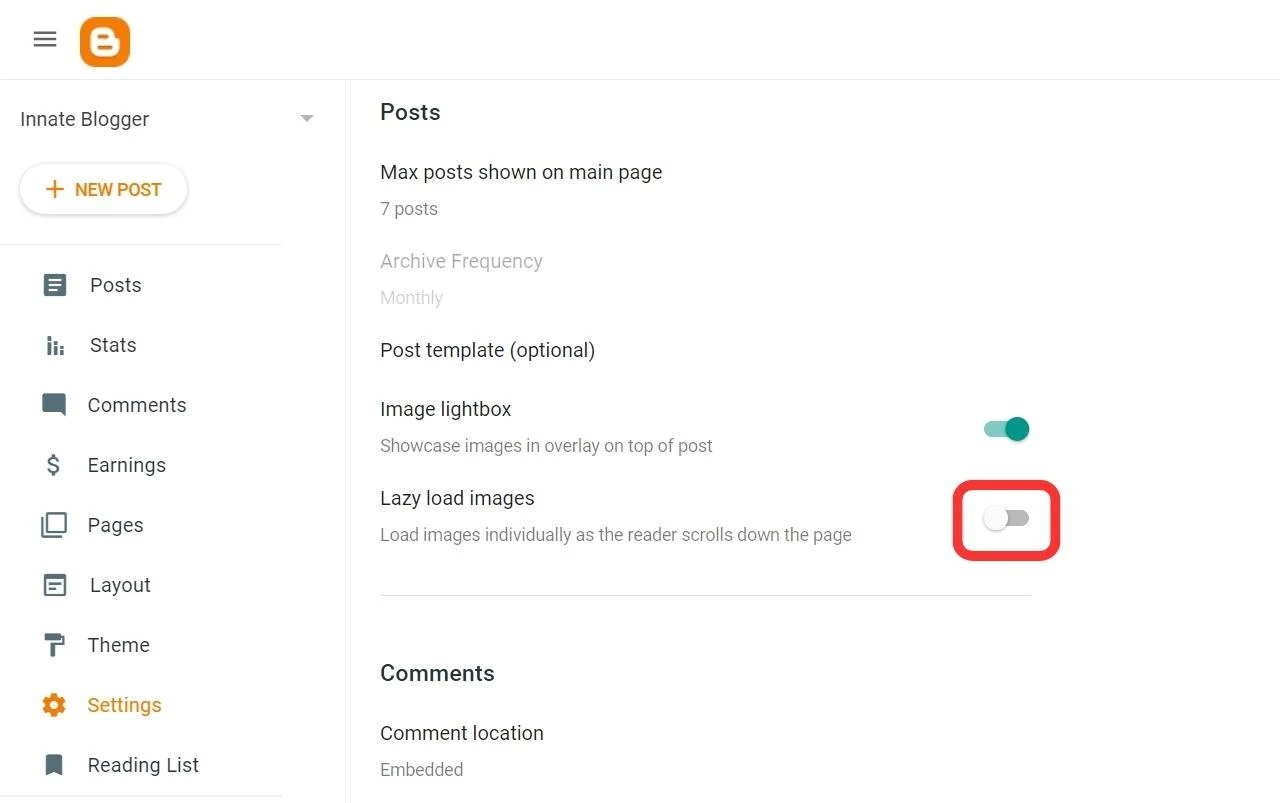
Blogger has recently added a new feature for image lazy loading in its dashboard. This means that you don’t have to worry about adding any CSS code or JavaScript to your Blogger website. This new feature allows you to enable image lazy loading on your blogger website with just one click.
To enable image lazy loading on your Blogger website, you need to follow these simple steps:
- Go to Settings > Posts > Lazy Load Images
- Turn on the option to enable lazy loading for all images on your website

By enabling this option, all your images will be lazy loaded automatically on your Blogger websites. I tested this setting on “Pagespeed Insights” and it works perfectly both in the blog content and the layout.

Lazy loading is useful for every blogger who is not very familiar with coding because it improves the page loading speed and performance significantly. Blogger is constantly updating its platform to make things easier and better for bloggers.
Lazy Load Images on Blogspot Website [Old Methods]
There are two different ways for Lazy loading images on your Blogger website. You can either do it manually using browser-level image lazy loading or you can use Javascript for automation.
Either way, you won't have any problem deferring offscreen images on your blog after reading this.
Browser-level Image Lazy Loading
From mid-2019, all major browsers like Chrome, Firefox, etc. support browser-level lazy loading. It means browsers support lazy loading by default, so there's no need for extra Javascript.
All you have to do is to add a loading attribute to your image. To do that, you have to go to the HTML view of your post after you upload the image.
Generally, you will see HTML code like this.
<div class="separator" style="clear: both; text-align: center;">
  <a
    href="https://blogger.googleusercontent.com/***/Image.png"
    style="display: block; padding: 1em 0; text-align: center; "
    ><img
      alt=""
      border="0"
      data-original-height="360"
      data-original-width="640"
      src="https://blogger.googleusercontent.com/***/Image.png"
  /></a>
</div>
Now, here you have to add the loading="lazy" attribute before the src.
Then, it will look like this.
<div class="separator" style="clear: both; text-align: center;">
  <a
    href="https://blogger.googleusercontent.com/****/Image.png"
    style="display: block; padding: 1em 0; text-align: center; "
    ><img
      alt=""
      border="0"
      data-original-height="360"
      data-original-width="640"
      loading="lazy"
      src="https://blogger.googleusercontent.com/***/Image.png"
  /></a>
</div>
You have to add the loading="lazy" attribute manually in HTML code to
every single image you upload.
Once you add the attributes, you will see that Lazy loading is enabled on your website. You can check it, with the help of Page Speed insights.
Enter the URL of your article, and check whether lazy loading is working or not. If Lazy Loading is working properly, then you will see Defer Offscreen images in the passed audits.

Defer Offscreen Images using Javascript
If you don't want to add loading="lazy" manually for every single image you
upload, then you can use the Javascript method to lazy load images on
Blogspot.
For lazy loading images using Javascript, follow the following steps:
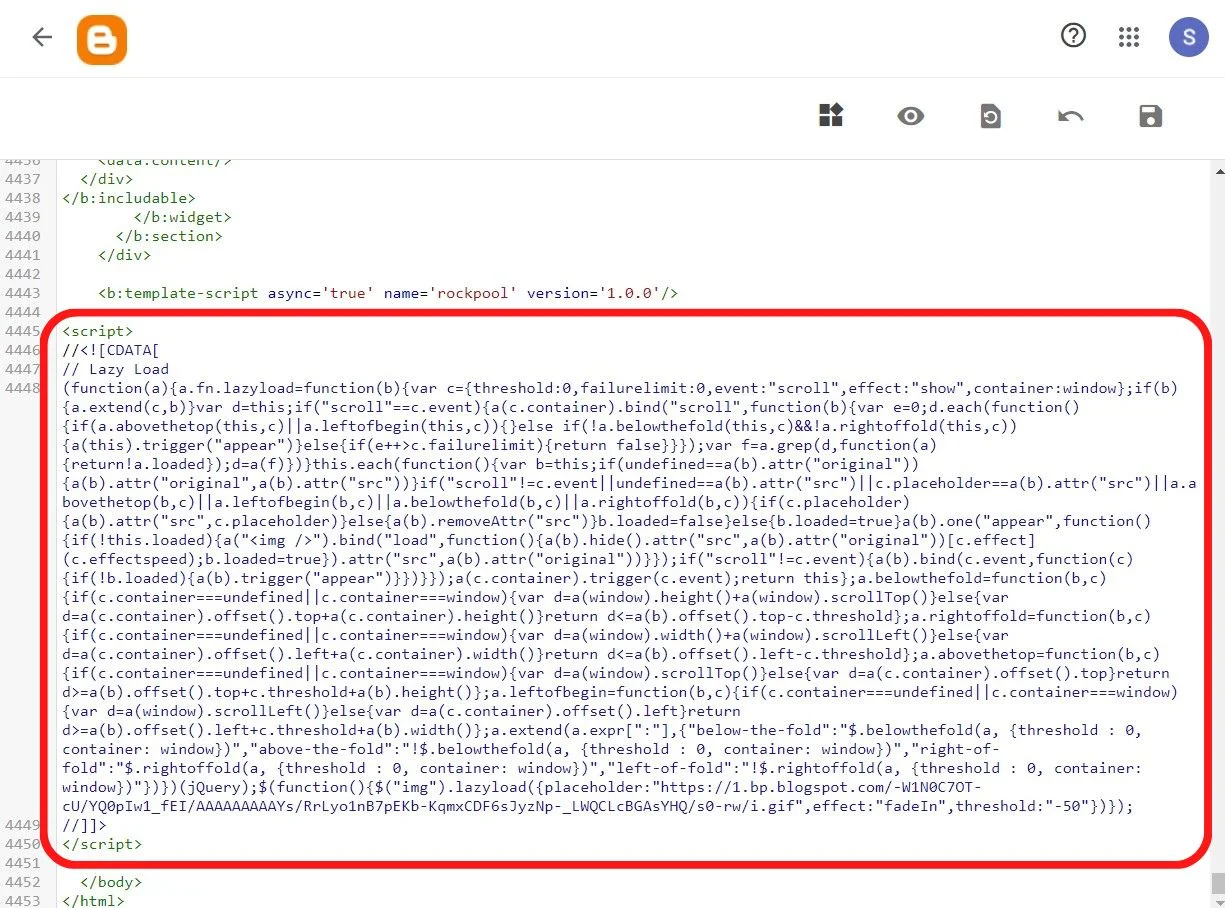
Step 1: Copy the complete Javascript Code given below.
<script>
//<;b.loaded=true}).attr("src",a(b).attr("original"))}});if("scroll"!=c.event){a(b).bind(c.event,function(c){if(!b.loaded){a(b).trigger("appear")}})}});a(c.container).trigger(c.event);return this};a.belowthefold=function(b,c){if(c.container===undefined||c.container===window){var d=a(window).height()+a(window).scrollTop()}else{var d=a(c.container).offset().top+a(c.container).height()}return d<=a(b).offset().top-c.threshold};a.rightoffold=function(b,c){if(c.container===undefined||c.container===window){var d=a(window).width()+a(window).scrollLeft()}else{var d=a(c.container).offset().left+a(c.container).width()}return d<=a(b).offset().left-c.threshold};a.abovethetop=function(b,c){if(c.container===undefined||c.container===window){var d=a(window).scrollTop()}else{var d=a(c.container).offset().top}return d>=a(b).offset().top+c.threshold+a(b).height()};a.leftofbegin=function(b,c){if(c.container===undefined||c.container===window){var d=a(window).scrollLeft()}else{var d=a(c.container).offset().left}return d>=a(b).offset().left+c.threshold+a(b).width()};a.extend(a.expr[":"],{"below-the-fold":"$.belowthefold(a, {threshold : 0, container: window})","above-the-fold":"!$.belowthefold(a, {threshold : 0, container: window})","right-of-fold":"$.rightoffold(a, {threshold : 0, container: window})","left-of-fold":"!$.rightoffold(a, {threshold : 0, container: window})"})})(jQuery);$(function(){$("img").lazyload({placeholder:"https://blogger.googleusercontent.com/img/b/R29vZ2xl/AVvXsEg3otHjbIFl6Im_57SeWZWlkQi8v8UUrM8JH8nLIpde6bqXbo_o3IGwPuYsgdkQhzMTRKzkpvwjyEShwDQugFbFl5qXwG9nEYKuAoQddQgjvGO9iZc3taaVuw4iaqZ2VHA4uVhLAXk-Yg/s16000-rw/i.webp",effect:"fadeIn",threshold:"-50"})});
//]]>
</script>Step 2: Log in to your Blogger Dashboard and go to the Themes section.
Step 3: Click on Edit HTML and visit the theme's coding.
Step 4: Search for the </body> tag using CTRL+F (Or you
can scroll down to the ending of the code).
Step 5: Paste the previously copied Javascript, just above the
</body> tag. And save the theme.

That's it. You successfully enabled the Lazy loading function on your Blogger website using Javascript.
You can check any of your posts on Page Speed Insights. You will find Defer Offscreen Images in the Passed Audits.
Conclusion
Image lazy loading is a great feature for bloggers who are not familiar with coding or who want to optimize their website without any hassle. It can help you improve your SEO ranking and attract more traffic to your website.
All of the methods that I discussed above work fine.
But, which one should you use?
I recommend enabling the Lazy load images option in the blogger settings, it's the easiest way to get your work done. You can also use Browser-level Image Lazy Loading. Even though it may be a little annoying to add a loading attribute every time, but still it's a good practice for your website.
If you use Javascript for lazy loading images, then every time the script will run as soon as someone visits your website. So, it will delay the load time of your website a little bit.
That's why I recommend using the first method.
That's all for this post, if you have any questions then you can comment below.
